Table of Contents
ToggleLaundry day doesn’t have to mean sacrificing an entire room. Whether living in a compact apartment, converting a closet into a laundry nook, or reclaiming square footage in an older home, a space saver washer and dryer can deliver full-size performance in a fraction of the footprint. These compact appliances have evolved far beyond cramped, underpowered machines, today’s models offer serious capacity, efficiency ratings that rival conventional sets, and configurations designed for tight quarters. This guide walks through the types, benefits, selection criteria, and installation considerations so homeowners can make informed decisions without guesswork.
Key Takeaways
- A space saver washer and dryer fits in tight spaces like closets and bathrooms, delivering full functionality in 24-inch-wide units or stackable configurations that free up floor space.
- Stackable units cut footprint in half by securing a dryer atop a front-load washer, requiring at least 76 inches of ceiling height, while combo units compress both functions into a single 24-inch-wide machine.
- Compact washers use 10–15 gallons per cycle and many carry ENERGY STAR certification, reducing annual operating costs by $30–$50 compared to conventional top-loaders.
- Choose between vented dryers (45–60 minutes, requires exterior duct) and ventless condenser or heat-pump models (90–120+ minutes, install anywhere with a power outlet).
- Proper installation requires a dedicated 120V circuit, correctly leveled units, secure plumbing with braided hoses replaced every 5 years, and adequate airflow in closets to prevent mold from moisture buildup.
What Is a Space Saver Washer and Dryer?
A space saver washer and dryer refers to any laundry appliance designed to fit in confined areas where standard 27-inch-wide units won’t work. These machines typically measure 24 inches wide or less, though some stackable pairs retain the standard width but save floor space through vertical installation.
Compact washers usually offer 2.0 to 2.5 cubic feet of drum capacity, compared to 4.5–5.0 cubic feet in full-size front-loaders. That’s enough for roughly 12–15 pounds of laundry per load, adequate for singles, couples, or small families who run laundry more frequently.
Most compact units are front-loading because top-loaders need clearance for the lid, which defeats the purpose of stacking or tucking into closets. They connect to standard 120V household outlets, though ventless dryers are common in this category and may require longer dry times. If the installation calls for vented exhaust, confirm ductwork can reach an exterior wall without excessive bends, every 90-degree elbow reduces airflow efficiency by roughly 5 feet of equivalent duct length.
Types of Space-Saving Washer and Dryer Configurations
Choosing the right configuration depends on available floor space, plumbing access, and ventilation options. Each layout has trade-offs in capacity, installation complexity, and cycle time.
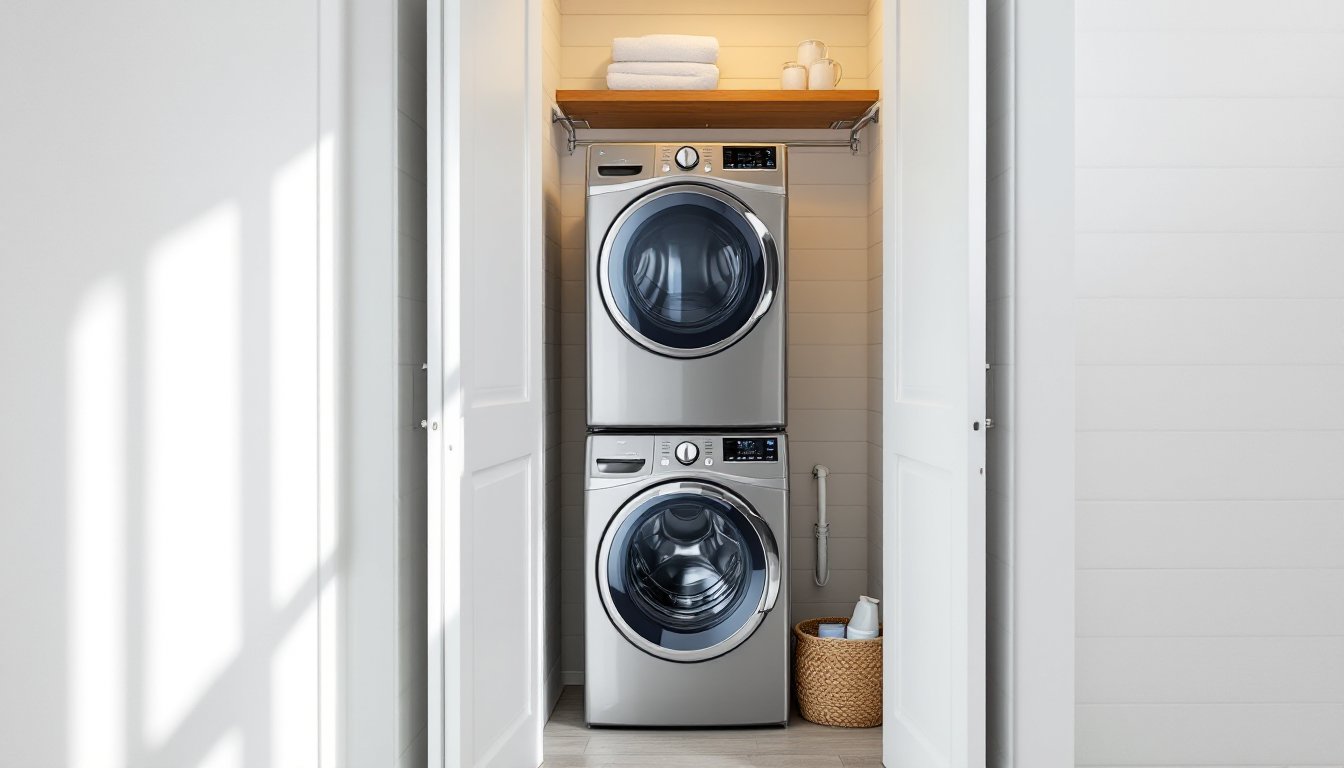
###Stackable Units
Stackable washer-dryer pairs use a stacking kit (usually sold separately for $100–$150) to secure the dryer atop the washer. This setup cuts the footprint in half, freeing up floor space for shelving or compact storage solutions.
Key considerations:
- Minimum ceiling height: Allow at least 76 inches from floor to ceiling to accommodate both units plus the stacking kit.
- Washer must be front-load: Top-load washers can’t be stacked because the lid needs clearance.
- Dryer can be vented or ventless: Vented models expel moisture through a 4-inch duct, while condenser or heat-pump ventless dryers collect water in a reservoir or drain via a hose. Ventless units take 50–100% longer to dry but require no exterior vent.
- Load access: The dryer door will sit 38–42 inches off the ground. For anyone under 5’4″, loading and unloading may require a step stool.
Stackables are ideal for closets, utility rooms, or alcoves where width is limited but vertical clearance exists. If the closet has bifold doors, measure the door opening width with doors fully open, many bifold frames reduce usable width by 2–4 inches.
Combo Washer-Dryer Units
A combo unit performs both washing and drying in a single drum. Load dirty clothes, select a wash-dry cycle, and return hours later to clean, damp-dry or fully dry laundry.
Pros:
- Smallest footprint: Typically 24 inches wide, 24 inches deep, 33 inches tall.
- No venting required: Most combos use ventless condensing technology.
- One appliance, one hookup: Simplifies installation in apartments or homes without dedicated laundry rooms.
Cons:
- Long cycle times: A full wash-dry cycle can take 3–6 hours. The drum must partially empty for effective drying, so capacity drops from ~2.3 cubic feet (wash) to ~1.2 cubic feet (dry).
- Energy use: Running both functions in sequence consumes more electricity than separate, optimized machines.
- No simultaneous operation: Can’t wash a second load while the first dries.
Combo units suit studio apartments, RVs, or in-law suites where space is the absolute priority and laundry volume is low. Homeowners planning to wash multiple loads per day will find the cycle time frustrating.
Key Benefits of Space Saver Washer and Dryer Units
Beyond the obvious square-footage savings, compact laundry appliances offer practical advantages that make them viable for a range of living situations.
Flexible installation locations: Standard laundry pairs require a dedicated 6×6-foot room. Compact units fit in hallway closets, under counters, or in bathrooms with proper waterproofing. This flexibility is especially valuable in older homes where laundry hookups weren’t part of the original floor plan.
Lower water and energy consumption: Compact front-loaders typically use 10–15 gallons per cycle versus 20–25 gallons for conventional top-loaders. Many models carry ENERGY STAR certification, reducing annual operating costs by $30–$50. Heat-pump dryers, though pricier upfront, can cut drying energy use by up to 50% compared to conventional electric dryers.
Easier to move and install: Weighing 100–150 pounds each (versus 200+ for full-size units), compact machines are manageable for two people to maneuver through doorways and up stairs. This matters in apartments or condos with narrow hallways.
Reduced noise and vibration: Smaller drum diameter and lower spin speeds (typically 1,200–1,400 RPM) produce less vibration than full-size washers that hit 1,600 RPM. Pair this with anti-vibration pads and the unit can run in a bedroom closet without waking anyone.
Some homeowners integrate compact laundry into multi-functional spaces like mudrooms or guest bathrooms, maximizing utility without carving out a dedicated laundry room.
How to Choose the Right Space Saver Washer and Dryer for Your Home
Selecting the right compact laundry setup requires balancing capacity, features, installation constraints, and budget. Start by measuring the intended space and working backward.
Measure three times, buy once:
- Width, depth, and height of the alcove or closet, accounting for door swing and hose clearance.
- Add 1 inch on each side and 4–6 inches behind the washer for water supply lines, drain hose, and airflow.
- For stackables, confirm ceiling height allows the stacked dryer door to open fully without hitting overhead shelves or light fixtures.
Capacity vs. household size:
- 1–2 people: 2.0–2.3 cubic feet handles weekly laundry in 2–3 loads.
- 3–4 people: 2.4–2.5 cubic feet minimizes load frequency.
- Families of 5+: Consider whether a compact set will keep pace, or if a laundromat or second unit is needed for linens and towels.
Vented vs. ventless drying:
- Vented dryers dry faster (45–60 minutes) but require a 4-inch duct to an exterior wall. Check local code, some municipalities restrict dryer vents in multi-family buildings.
- Condenser dryers collect moisture in a tank or pump it to a drain. They take 90–120 minutes per load but install anywhere with a power outlet.
- Heat-pump dryers (a ventless subcategory) recycle hot air, cutting energy use dramatically but extending cycle time to 2+ hours. Best for those prioritizing efficiency over speed.
Control features:
Modern compact units offer smartphone connectivity, auto-detergent dispensers, and steam cycles. Assess which features justify the price jump. A basic mechanical-dial model from a reputable manufacturer will outlast a feature-laden unit with a cheap inverter motor.
Warranty and service network:
Compact laundry appliances often come from European or Asian manufacturers with smaller U.S. service footprints. Verify the brand has authorized repair centers within 50 miles. Extended warranties (typically $150–$300) can be worthwhile if the nearest technician is two hours away.
For shoppers comparing tested washer-dryer sets, pay attention to spin speed, noise ratings (measured in decibels), and whether the control panel is intuitive. A confusing interface turns every load into a guessing game.
Installation Tips and Space Planning Considerations
Proper installation prevents leaks, vibration damage, and voided warranties. Even experienced DIYers should approach compact laundry installation methodically.
Electrical requirements:
Most 24-inch washers and ventless dryers run on 120V, 15-amp circuits. Verify the outlet is on a dedicated circuit, sharing with a refrigerator or microwave can trip breakers mid-cycle. Vented electric dryers may require 240V, 30-amp service. If the existing outlet doesn’t match, hire a licensed electrician. Homeowner-installed 240V circuits often fail inspection and create fire hazards.
Plumbing hookups:
- Hot and cold supply lines: Use stainless-steel braided hoses rated for washing machine pressure (minimum 300 psi burst strength). Replace hoses every 5 years to prevent failures.
- Drain hose: Must rise to at least 34 inches above the floor (to prevent siphoning) before descending into a standpipe or laundry sink. Secure with a zip tie or hose clamp, vibration can work hoses loose.
- Shutoff valves: Install quarter-turn ball valves on both hot and cold lines. Cheaper compression valves are prone to leaks.
Leveling the washer:
An unlevel washer will “walk” across the floor during the spin cycle, damaging flooring and stressing internal components. Use a 24-inch torpedo level on top of the washer, checking front-to-back and side-to-side. Adjust the threaded feet until the bubble centers in both directions. Lock feet with the included jam nuts. For concrete floors, anti-vibration pads (available for $20–$40) dampen noise transmitted through the slab.
Ventilation and moisture control:
Even ventless dryers release some humidity. If installing in a closet, ensure the door has louvered panels or a 1-inch gap at the bottom for airflow. Trapped moisture encourages mold. In bathrooms, run the exhaust fan during and after dry cycles.
Some urban dwellers installing compact laundry in tight living spaces add a condensate pump ($80–$120) to route drain water vertically to a sink or exterior drain line when gravity drainage isn’t feasible.
Permits and code compliance:
Most jurisdictions don’t require permits for replacing existing laundry appliances, but adding new hookups (plumbing, electrical, or gas) typically does. Check with the local building department. Unpermitted work can complicate home sales or insurance claims after water damage.
Stacking kit installation:
Don’t skip the stacking kit, it’s not optional. Generic kits may fit, but manufacturer-specific kits include brackets that bolt into pre-drilled holes and anti-slip pads sized for the exact dryer footprint. Installation takes 15–20 minutes with a socket wrench. Lift the dryer with a helper: these units are awkward and top-heavy. If solo, tilt the dryer onto a furniture dolly, roll it into position next to the washer, then slide it onto the stacking bracket.
Final checks:
- Run a test cycle with no laundry to verify water fills, drains, and the drum spins without hitting the cabinet.
- Listen for unusual noises, shipping bolts left in place will cause violent shaking.
- Check all connections for leaks during the fill and drain phases.
- For ventless dryers, confirm the condensate tank seats properly and the drain hose (if used) doesn’t kink.
Homeowners who’ve tackled similar projects, like installing space-efficient furniture, will find compact laundry installation straightforward. Those less confident with plumbing should budget $150–$300 for professional installation. It’s cheaper than repairing water damage from a botched DIY hookup.