Table of Contents
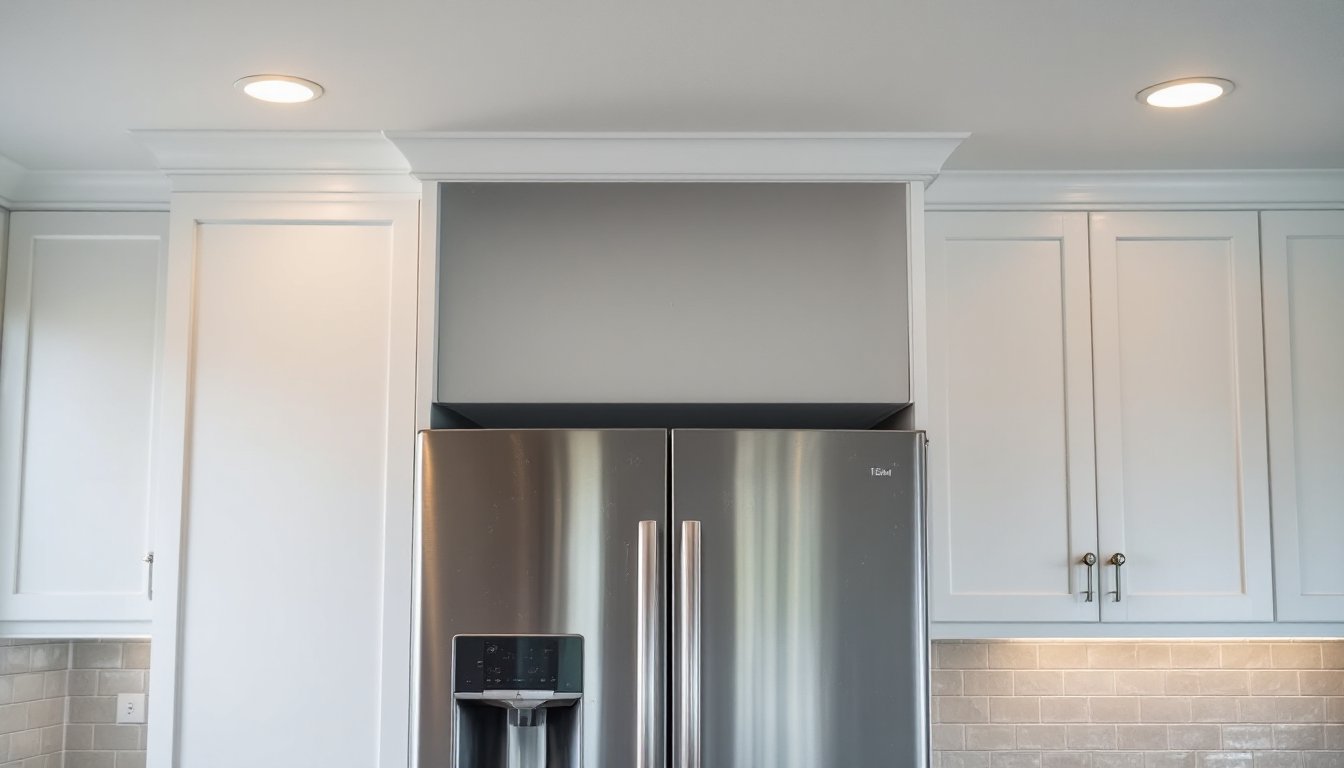
ToggleThat gap between the top of your fridge and the ceiling isn’t just an eyesore, it’s a magnet for dust, wasted potential, and the random clutter that somehow migrates to every flat surface in your kitchen. Most kitchens have it. Few homeowners know what to do with it. Whether it’s 6 inches or 2 feet of dead space, this vertical no-man’s-land presents a genuine design challenge. But with the right approach, storage, structure, or style, you can turn that awkward zone into something functional or make it visually disappear altogether.
Key Takeaways
- The awkward space above refrigerator exists due to varying fridge heights and ceiling clearances, creating a dust trap and visual gap that requires intentional design solutions.
- Storage baskets and custom cabinetry are viable options for organizing the fridge gap if you have at least 12–15 inches of vertical clearance, but prioritize safety by keeping items light and accessible.
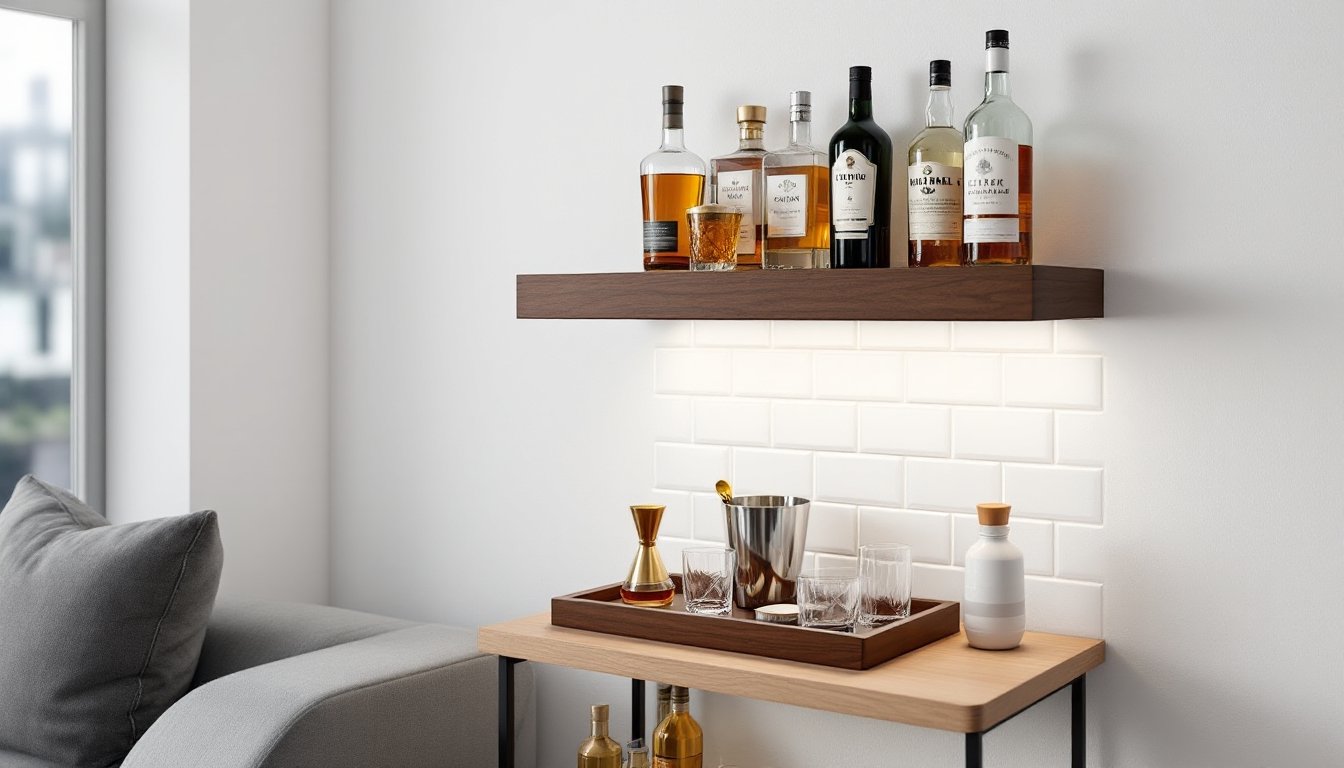
- Decorative solutions like crown molding, faux beams, or floating shelves can visually eliminate the gap without adding storage, making it blend seamlessly with your kitchen design.
- DIY projects such as building a simple storage shelf, installing pull-down hardware, or creating a faux cabinet front can transform the space affordably in an afternoon with basic tools.
- Never store wine, medications, fresh food, important documents, or flammable materials above your refrigerator, as heat from the compressor degrades quality and poses safety risks.
- Always leave at least 1 inch of clearance at the back and sides of any installation to ensure proper airflow for the refrigerator’s ventilation system.
Why the Space Above Your Refrigerator Is So Challenging
Unlike upper cabinets, the fridge gap wasn’t planned. It exists because refrigerators come in a range of heights, typically 66 to 70 inches for standard models, while ceiling heights vary from 8 to 10 feet or more. Builders leave clearance for ventilation and appliance removal, but rarely finish the space intentionally.
That creates three core problems. First, it’s hard to reach, anything you store up there requires a step stool and some stretching. Second, it’s a dust trap. Heat from the fridge coils rises, carrying grease particles and airborne kitchen debris that settles on whatever’s up top. Third, it’s visually awkward. The gap breaks up the clean line of your cabinetry and draws the eye to empty, unfinished space.
Adding to the complexity, refrigerators need airflow around the compressor. Most manufacturers recommend at least 1 inch of clearance on the sides and back, plus space on top for heat dissipation. That means any solution you build can’t block vents or create a fire hazard by trapping heat.
Before tackling this space, measure the actual gap height, width, and depth. Refrigerators aren’t always flush with your counters, many sit proud by a few inches. You’ll need those dimensions to pick the right storage solution, build a cabinet, or determine if a decorative fix makes more sense.
Smart Storage Solutions for Above-Fridge Space
If you’ve got at least 12 inches of clearance, storage becomes a viable option. Just remember: this isn’t prime real estate. Reserve it for items you don’t need daily.
Baskets and Bins for Organized Storage
Wicker baskets, plastic bins, or fabric storage cubes are the simplest retrofit. Measure your gap and choose containers that fit snugly without blocking side vents. Wicker or rattan baskets blend with farmhouse or transitional kitchens, while clear acrylic bins suit modern or minimalist spaces.
Use this zone for:
- Seasonal serving dishes (holiday platters, punch bowls)
- Small appliances used monthly or less (fondue pot, waffle iron)
- Bulk pantry overflow (paper goods, extra canned items)
- Cookbooks you reference occasionally
Label bins on the front edge so you can identify contents from below. Avoid overfilling, these containers need to be light enough to lift down safely. Popular small kitchen organization tactics often recommend bins with handles for easier retrieval.
Safety note: Don’t overload baskets. Weight adds up fast, and reaching overhead while balancing on a step stool is a recipe for injury. If a bin weighs more than 10-15 pounds, store it elsewhere.
Custom Cabinetry to Match Your Kitchen
For a permanent, built-in look, install a cabinet box that matches your existing cabinetry. This works best if you’ve got at least 15 inches of vertical space, enough for a functional cabinet with a door.
You have two paths: hire a cabinet maker to build a matching unit, or buy stock cabinetry and have it finished to match. Expect to pay $200 to $600 for materials and installation, depending on your region and whether you DIY the install or hire a carpenter.
Key construction notes:
- Use ¾-inch plywood for the box: anything thinner will sag under weight.
- Secure the cabinet to wall studs with 3-inch cabinet screws, not just drywall anchors. The International Residential Code (IRC) doesn’t specify load requirements for upper cabinets, but a safe rule of thumb is to support at least 50 pounds per linear foot.
- Leave 1 inch of open space at the back for airflow and to accommodate outlets or the fridge’s power cord.
- Choose Euro-style hinges for face-frame or frameless construction: they’re easier to adjust if the cabinet isn’t perfectly level.
If your cabinets stop short of the fridge, you may need a filler strip or side panel to bridge the gap and create a cohesive look. Paint or stain to match, then add hardware that mirrors your existing pulls or knobs.
This solution works especially well in galley kitchens or layouts where continuity matters more than cost.
Decorative Ideas to Make the Space Disappear
Sometimes the smartest move is to embrace the gap and style it away. Decorative solutions won’t add storage, but they eliminate the visual clutter of an unfinished ledge.
Floating faux beams or a crown molding build-out can bridge the gap between cabinet tops and ceiling, creating the illusion of taller cabinetry. Use 1×4 or 1×6 poplar boards to construct a simple valance that spans the width of the fridge. Paint it to match your cabinets or ceiling. This trick shows up frequently in budget kitchen makeovers, where a few boards and a coat of paint transform the room’s proportions.
Attach the valance to wall studs with finishing nails and construction adhesive. If you’re spanning more than 3 feet, add a center support to prevent sagging.
Decorative panels or corbels mounted to the fridge sides can frame the appliance and visually anchor it. Use MDF or hardwood trim cut to height, then finish with paint or stain. This approach works best in kitchens with traditional or Shaker-style cabinetry.
Plants (faux or real) placed on top of the fridge soften the gap and add vertical interest. Keep them low-profile, tall arrangements look top-heavy. Real plants up here face two challenges: poor light and heat from the compressor. If you go live, choose hardy species like pothos or snake plants, and rotate them monthly to a sunnier spot.
Artwork or a shallow shelf with small objects (vintage jars, a coffee canister collection, framed prints) draws the eye and makes the space look intentional. Just remember: whatever you put up there will need dusting every month or two.
For renters or anyone hesitant to commit, peel-and-stick wallpaper applied to a foam board backing can create a quick visual panel. Cut the board to fit the gap, apply the paper, and lean it in place. Remove it when you move.
DIY Projects to Close the Gap Yourself
If you’re comfortable with a drill, saw, and level, you can build a simple enclosure in an afternoon.
Option 1: Build a storage shelf
Construct a box frame from 1×12 pine or poplar boards, sized to fit the gap. Use pocket hole screws (a Kreg Jig makes this easy) or butt joints reinforced with wood glue and 1¼-inch finishing nails. Attach the frame to wall studs using 2½-inch screws. Leave the front open for basket storage, or add a hinged door with concealed hinges.
Materials list:
- Two side panels (cut to gap height minus ½ inch)
- Top and bottom panels (cut to fridge width minus 1 inch)
- Back panel: ¼-inch plywood or skip it for open storage
- Wood glue, screws, finishing nails
- Sandpaper (120- and 220-grit)
- Primer and paint to match cabinets
Option 2: Install a pull-down shelf
Hardware exists for pull-down shelving systems, popular in European kitchens. These mount inside a cabinet box and allow you to lower stored items without a step stool. Expect to pay $80 to $150 for the hardware kit. You’ll still need to build or install a cabinet box, but the pull-down mechanism makes the space genuinely usable for lightweight items like spices or baking supplies.
Option 3: Create a faux cabinet front
If storage isn’t the goal, build a false door that matches your existing cabinets. Cut a ¾-inch plywood panel to size, apply edge banding, and finish to match. Mount it to a simple 1×2 frame secured to the wall. Add a handle or knob. From the ground, it’ll look like another upper cabinet, no one will know it doesn’t open.
Tools you’ll need:
- Circular saw or miter saw (miter saw gives cleaner cuts for trim)
- Drill/driver
- Level (4-foot level works best)
- Stud finder
- Measuring tape
- Clamps
- Safety glasses and dust mask
Before cutting anything, double-check your measurements. Nominal lumber dimensions differ from actual: a 1×12 is really ¾ x 11¼ inches. Factor that in when planning your cuts.
Most of these projects don’t require permits, they’re non-structural and cosmetic. But if you’re cutting into drywall, running electrical for cabinet lighting, or altering ventilation, check local codes. The IRC and NEC set standards for electrical work, and some jurisdictions require a licensed electrician for anything beyond plug-in fixtures.
What NOT to Store Above Your Refrigerator
Just because there’s space doesn’t mean everything belongs up there. Heat, dust, and limited accessibility make this spot a bad choice for certain items.
Avoid storing:
- Wine or spirits. Heat from the compressor can degrade alcohol and ruin flavor. Even occasional exposure to temps above 70°F affects quality.
- Medications or vitamins. Heat accelerates breakdown of active ingredients.
- Fresh food or pantry staples. Heat shortens shelf life. Flour, sugar, and grains can also attract pests.
- Important documents or photos. Heat and kitchen humidity will warp paper and fade ink.
- Heavy items. Anything over 15 pounds becomes a safety hazard when you’re reaching overhead.
- Flammable materials. Aerosols, lighter fluid, or anything combustible should stay far from heat sources.
Many home organization guides recommend this zone for bulk paper towels or extra napkins, those are fine, but even lightweight items get grimy fast. Expect to wipe down or replace anything stored here at least twice a year.
If you’re using baskets, line them with washable fabric or parchment paper to catch dust. And if your fridge runs hot (older models especially), consider leaving the space empty or purely decorative.